So much fun photographing these two. I've known Monty since he was in high school, and have photographed him many times. When I was taking photography classes many years ago, I hand painted a black and white photograph of him leaning on a fence - my first effort at hand coloring. That was in the early 1990s!
Monday, May 31, 2010
Ashley + Monty Engagement
So much fun photographing these two. I've known Monty since he was in high school, and have photographed him many times. When I was taking photography classes many years ago, I hand painted a black and white photograph of him leaning on a fence - my first effort at hand coloring. That was in the early 1990s!
Wednesday, May 19, 2010
Herding Cats - Photographing Families and Groups
1. Photographing families is often like herding cats, but it can be done. Embrace the role of director.
2. Pay attention to height levels or direct some people to stand and others to sit. Encourage everyone to compose themselves at an angle to the camera.
3. If your family is affectionate - show it. If they are more formal, set up your shot in a more traditional way.
4. Don't be offended by lack of cooperation. If you can't reel in a family member, use the situation in a humorous or interesting way.
5. Once you've got everyone's attention, start out with a series of shots where all eyes are on you. Do whatever it takes to accomplish that. Then, spice it up. Is the family playful or silly? Do they all love something you can play up? Is there a friendly rivalry?
6. Remember, light is the key to all photography.
Indoors: Position family members facing a window or light source. Place yourself between family and the light.
Outdoors: Keep your family's eyes out of the sun. Find open shade or use a device (a sheet, a reflector) to block the sun. If you don't have great light to work with, put their backs to the sun and use fill flash.
7. Don't just line 'em up. Come in with a plan, then veer as the opportunity arises.
Create Authentic Kid Photos
1. My first tip is a surprising one - leave the kids alone. Photograph with your longest lens and capture them as they are playing and exploring.
2. Encourage them to do what THEY like to do. The perfect moments are ones that are authentic. Kids have the advantage of being adorable, regardless of what they are doing.
3. Use a fast shutter speed to capture their movement (1/500th or faster). Take a series of photos to show the beginning, middle and end of their discoveries.
4. If you direct them, make it into a game. Be creative - you can make up a game or use familiar ones.
5. Encourage them to show off for you. How high can you jump? How far can you throw? How fast can you run?
6. Celebrate your child. Let her show you how funny and clever she is.
7. Photograph the things that will later remind you of your child at a particular age - artwork, worn shoes, sports equipment.
8. As always, play with your point of view. Photograph straight down with your child lying on the ground. Or photograph straight up with you on the ground.
Eight Tips for Better Portraits
1. The eyes have it. It's no surprise that the expression in the eyes is crucial in most portraits. The question is - do you want your subject's eyes engaged with your lens or not? Eye contact carries with it an intensity and immediacy, whereas your subject looking away gives your shot a more candid feel.
2. Take a wide variety of photographs to learn what works for you. Don't be afraid to move your feet.
3. Decide at key moments whether it's better for you as the photographer to interact with your subjects or to step back and take candids. Do both!
4. Look for patterns. Learn to assess the direction of the light.
5. Find the meaningful story. Think of yourself as a visual storyteller and include the elements that tell that story.
6. Try not to photograph your subject straight on. A tip for a comfortable, flattering way for the subject to stand is with the torso at a diagonal and the subject's weight on the back foot.
7. Take a few shots after your subject thinks you're done. Look for the in-between moments.
8. Move around to create a background that adds to the story. Watch for background poles and trees coming out of the subject's head.
8. Move around to create a background that adds to the story. Watch for background poles and trees coming out of the subject's head.
Saturday, May 15, 2010
Joel + Oliver
Site: Fairmont Sonoma Mission Inn and Spa
Catering Manager: Catherine Merry
Wedding Coordinator: Kelly McLeskey, A Savvy Event
Flowers: Lavender Floral
Catering and Cake: Fairmont Sonoma Mission Inn
Video: Boyer Productions International
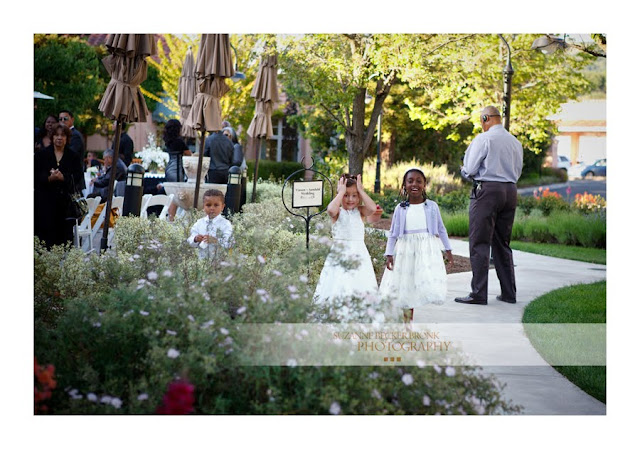
This was a perfect wedding at the Fairmont Sonoma Mission Inn. The bride was meticulous in her choices, then relaxed on her wedding day.
The Fairmont has so many beautiful areas to photograph - everywhere you look there are arches, ivy covered buildings, beautiful walkways and lovely sculpture. It was a sunny California day. The ceremony area was bathed in shade.
I loved photographing this wedding - classy and elegant and joyous and fun. The bride is gorgeous; the groom a sweetheart with three great kids.

Subscribe to:
Comments (Atom)


